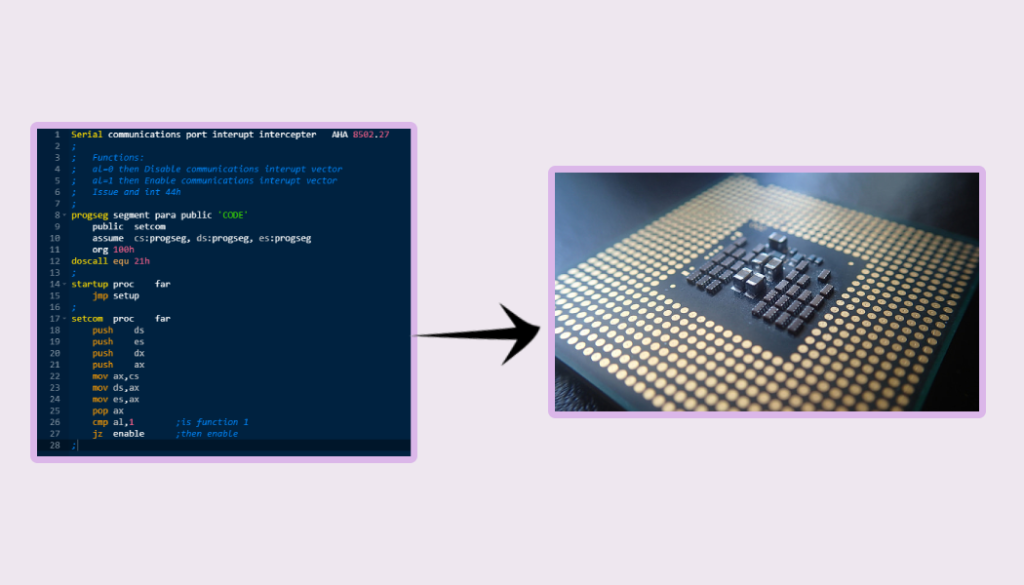
Aaaand the exciting journey starts.
We are getting into assembly with the assumption that you are comfortable with the basics of some higher level programming language like C, C++, Python etc. If not, there is a chance you get confused by some topics. Let me know in the comments so that I can explain that part for you.
To master Assembly there are three things to understand:
1. Layout of program in memory – Chill, just the basics
2. Resources accessible by assembly
3. The Assembly Syntax
Thats all! I will try to condense the contents to the bare minimum for you to understand the assembly code. As each of these topics will lead you down the rabbit hole.
Layout of program in memory
When you execute a program, the operating system gives that program a portion of the memory (Address Space) for it to run. Each of these memory blocks are divided into segments which we can use for different purposes.
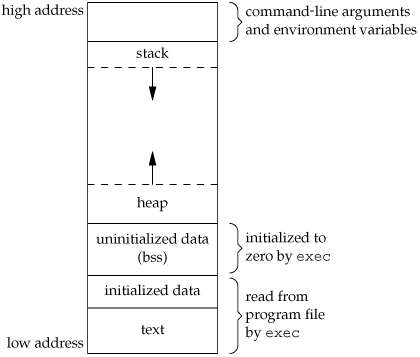
For easier understanding, imagine a dorm/hostel (Memory), where you are allocated a room by the landlord/warden(Operating system). Each room will contain a bedroom, a storage, washroom, maybe a kitchenette. They are there for specific use case and the dweller (Programmer) can use them accordingly. This is the chunk of memory assigned for the program:

Each of these sections serve different purposes. Everything used in the program will be allocated in between the low address and the high address.
Memory Segments
- [text] : This part of the memory is where the executable part of the program is going to sit. The commands that tells the processor what to do and when to do are filled here.
- [data] : This is where the program stores the initialized data. Global variables with values assigned are stored here. You might ask, Just global? Then what about the variables initialized locally? You’ll see soon…
For example assignments like this in C -> [int a =5;] - [bss] : Uninitialized data is stored in here. Again the values that are defined globally, but not assigned any values are put here.
For example assignments like this in C -> [int a;] - [heap] : This section is useful in reserving memory dynamically. Heap is used when the program reserves space during the runtime of the program. What if you wanted to store the information of people you talk with… you are not sure how many you are going to meet. so you create a space for the person each time you meet one. heap is specifically allocated for that. One thing to note… The heap memory grows upwards the address space (denoted by the arrowmark in fig).
- [stack] : Very very important when it comes to assembly programming. This is where your local variables are stored. This is also where functions inside your program gets its own data space also known as stack frame. You will be manipulating this a lot when you are writing functions in assembly. Note that the stack memory grown downwards (denoted by arrowmark in fig).
Fun fact: If by any chance the stack memory address in the program grows and goes over the heap memory address, which can crash or show unwanted behavior commonly known as ‘Stack Overflow’! Woohoo!
Resources accessible by Assembly
When you write your first assembly code, you will be controlling basically three things :
- ALU (Arithmetic Logic Unit) – A portion of processor which can do a bunch of math if you’re not familiar with it…
- Registers
- Stack
ALU (Arithmetic Logic Unit)
ALU is the smallest hardware structure to perform arithmetic and logical operations. It can include operations like addition, subtraction, AND, OR etc. Assembly program can directly access all of these operations directly.
Registers
For every CPU, along with all the computing units, there exists very specific memories that can be directly accessed by the processor, known as Registers. Registers are extremely fast and is the closest in comparison to other memories like RAM or SSD. According to the x86-64 architecture, there are 16 general purpose registers which can be directly used in Assembly for our program.
Why are these important? The ALU we use to do the calculations are directly connected to only these registers. So keep in mind, if you have two integers in memory, you need to bring it to these registers before asking the ALU to do calculations with them.
x86-64 registers [Only the 64 bit registers are shown here]
| rax | Register A |
| rbx | Register B |
| rcx | Register C |
| rdx | Register D |
| rbp | Register base pointer(start of stack) |
| rsp | Register stack pointer(current location in stack) |
| rsi | Register source index (source for data copies) |
| rdi | Register destination index (destination for data copies) |
| r8 | Register 8 |
| r9 | Register 9 |
| r10 | Register 10 |
| r11 | Register 11 |
| r12 | Register 12 |
| r13 | Register 13 |
| r14 | Register 14 |
| r15 | Register 15 |
[Checkout this link for the full version of the registers]
Among these a few are important for the next lesson
1. rax – The accumulator register -> Stores most results of the calculations performed by ALU. Useful in getting the return of functions after the function call.
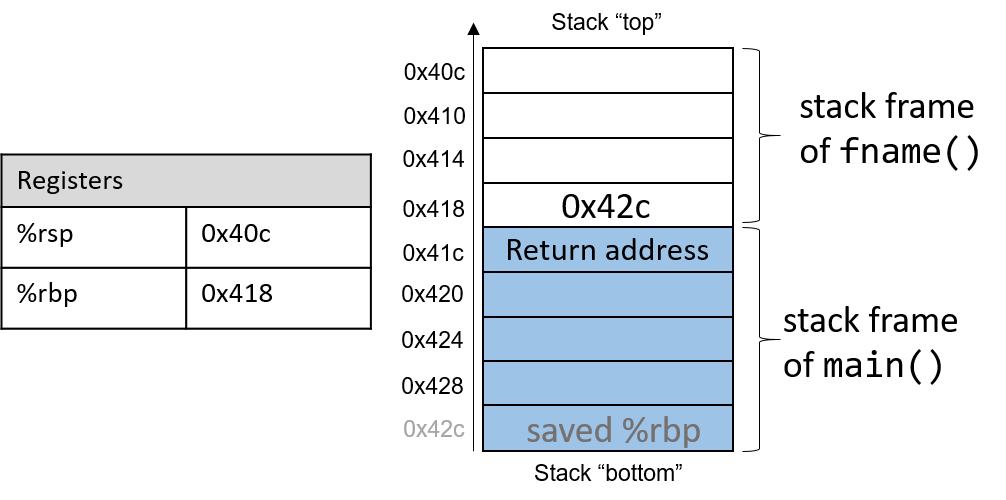
2. rbp – The base pointer -> When a function is called in assembly, a new memory area is assigned above the current stack for the function. Important to note that this register contains a pointer and not the value in the pointer. Additional variables for the function is added on top of this stack. Also known as Stack Frame. FYI : each function is assigned a stack frame.
3. rsp – The stack pointer -> This one points directly to the current location of the stack. Important to note that this register contains a pointer and not the value in the pointer.
rsp - rbp = size of the stack frame for the current function
R8 to R15 are general purpose registers which can theoretically be used as scratch registers. (We will cover the caveats of these soon).
The Assembly Syntax
Checkout this example:
section	.data
msg db 'Hello world!', 0xa ;string stored in msg

section	.text
   global _start

_start:
   mov	rdx,12     ;message length
   mov	rcx,msg     ;message to write
   mov	rbx,1       ;file descriptor for stdout
   mov	rax,4       ;system call value for sys_write
   int	0x80        ;call kernel

   mov	rax,1       ;system call value for sys_exit
   int	0x80        ;call kernel
Notice three things
- sections:
We can specify what piece of code can go which blocks. Use the above mentioned memory layout for your reference when writing the sections. They are defined as ‘section .[name of the section]’. Quite straightforward. - labels:
Notice the small text that follows with a colon (_start:)? These are called labels that are used to note small ‘Checkpoints’ in the program which you can refer to jump at any point in the program. Useful to create conditions or loops in the program.
Make sure to include the line ‘global [start label]’ as the first line in text section since it defines the entry point of the program. - instructions:
These has the command name, and the operands following them. Can be zero or more operands depending on the command. - comments:
When you write anything after a semicolon, it becomes a comment and is skipped in the execution.
Quite simple so far I see… Now, lets get the same code and see how it works. 💪
Part 3. Hardware Mastery with ‘Assembly’: Hello world analysis (In the works…)


hello